
Overview:
Applications have become very complex & user’s expectations have changed over the years! Applications nowadays have to be resilient and fault tolerant. It is easy to scale in / out our applications when they are designed stateless. But what about Database? Database is supposed to be a stateful application! How can we scale out horizontally?
CockroachDB is a prime example of NewSQL with ACID guarantee of SQL and the scale of NoSQL. It is open source and freely available for cloud-native and hybrid deployments.
CockroachDB:
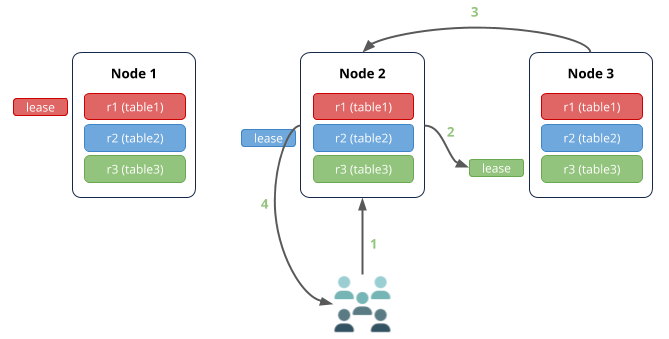
CockroachDB’s architecture is more or less like Kafka. That is, it distributes the table across multiple nodes and maintains multiple replicas. When any of the node goes down, we can still read / write into the DB using other nodes. When the crashed node comes up, it gets synchronized with other nodes automatically!
Java applications can use the postgres driver to connect the CockroachDB.
Local Cluster:
We can use the below docker compose file to create a 3 node cluster.
- Save this content in a directory with the name docker-compose.yaml
version: "3"
services:
  roach1:
    image: cockroachdb/cockroach:v19.2.5
    container_name: roach1
    hostname: roach1
    volumes:
      - ./db/roach1:/cockroach/cockroach-data
    ports:
      - 9090:8080
      - 26257:26257
    command: ["start", "--insecure", "--advertise-addr=roach1"]
  roach2:
    image: cockroachdb/cockroach:v19.2.5
    container_name: roach2
    hostname: roach2
    volumes:
      - ./db/roach2:/cockroach/cockroach-data
    ports:
      - 9091:8080
      - 26258:26257
    command: ["start", "--insecure", "--advertise-addr=roach2", "--join=roach1"]
  roach3:
    image: cockroachdb/cockroach:v19.2.5
    container_name: roach3
    hostname: roach3
    volumes:
      - ./db/roach3:/cockroach/cockroach-data
    ports:
      - 9092:8080
      - 26259:26257
command: ["start", "--insecure", "--advertise-addr=roach3", "--join=roach1"]- Issue the below command.
docker-compose up- In a different terminal run these commands one by one.
- Access the node 1 container.
docker exec -it roach1 ./cockroach sql --insecure- Create a database called ‘vinsguru‘
create database vinsguru;- Create an user.
create user vins;- Grant privileges to the user vins.
grant all on database vinsguru to vins;Admin UI:
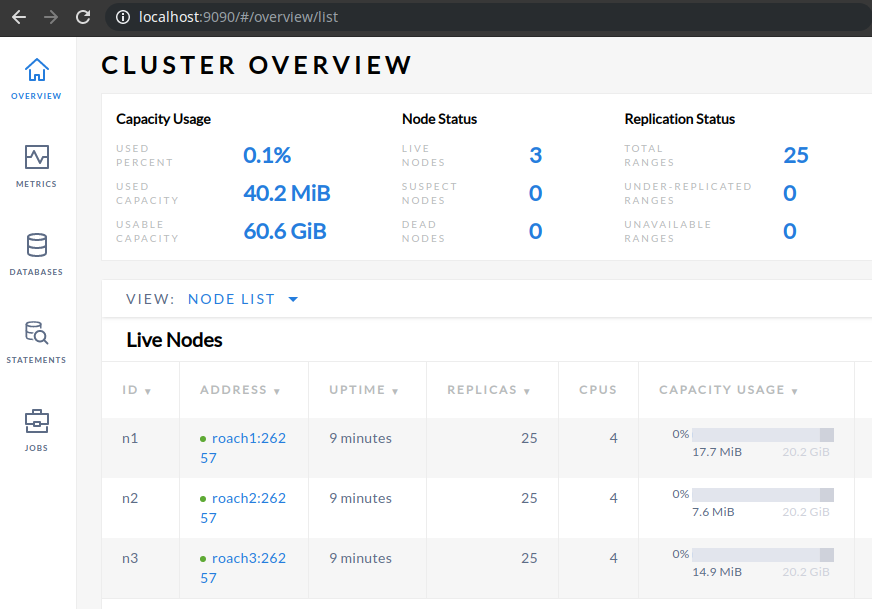
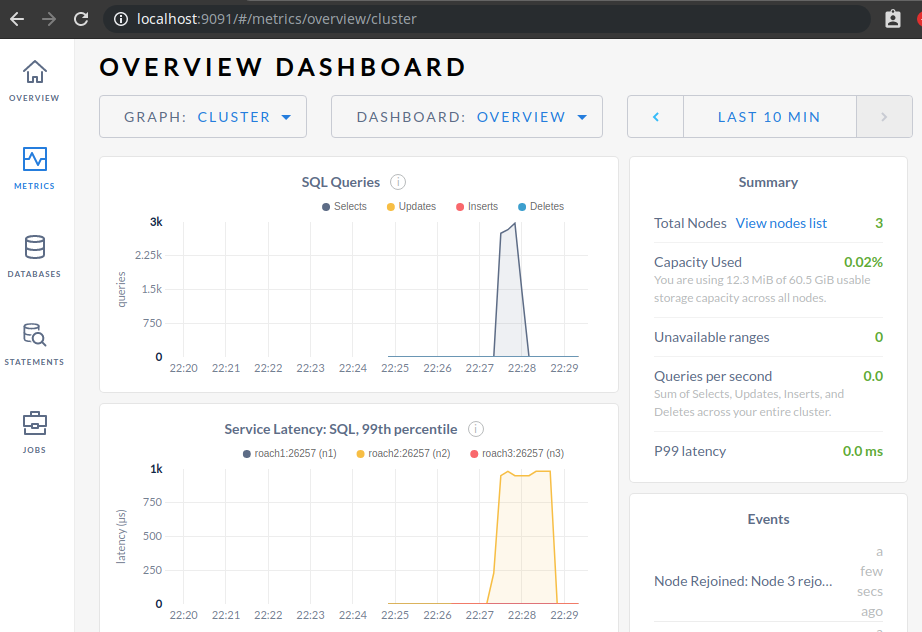
- You should be able to access the admin UI via port 9090. (Actually I have mapped the port 9090 with the container port 8080)
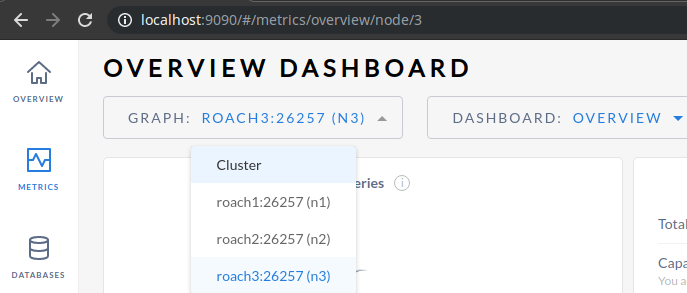
- We can see 3 nodes in our cluster
- You can connect your GUI DB client with the CockroachDB. Do note that the DB server port is 26757 (not 5432 as postgres DB)
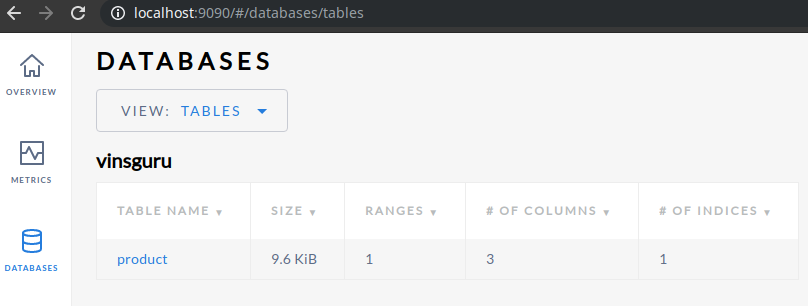
- I created a simple table using below query.
CREATE TABLE product(
   id VARCHAR (50) PRIMARY KEY,
   description VARCHAR (500),
   price numeric (10,2) NOT NULL
);- You can see the table created under the tables section
Spring Boot Integration:
- We do not have to do anything special to integrate with a Spring Boot application.
- As usual, this process is very simple and straight forward.
- Just ensure that you have the PostgreSQL driver included in your pom file.
- I have the below entity class. (Getters and setters are ignored as I use lombok)
- It is recommended to use UUID as the primary key type as it is a distributed DB to keep the ID safe and unique across multiple nodes in a cluster.
@Data
@Entity
@ToString
public class Product {

    @Id
    private UUID id;
    private String description;
    private double price;

}- Product Repository
@Repository
public interface ProductRepository extends JpaRepository<Product, UUID> {
}- Product service
@Service
public class ProductService {

    @Autowired
    private ProductRepository productRepository;

    // insert
    public void createProduct(Product product){
        UUID uuid = UUID.randomUUID();
        product.setId(uuid);
        this.productRepository.save(product);
    }

    // select all
    public List<Product> getAllProducts(){
        return this.productRepository.findAll();
    }

    // delete
    @Transactional
    public void deleteProduct(UUID id){
        this.productRepository
                .findById(id)
                .ifPresent(this.productRepository::delete);
    }

    // update
    @Transactional
    public Product updateProduct(Product product){
        return this.productRepository
               .save(product);
    }

}- product controller
@RestController
@RequestMapping("product")
public class ProductController {

    @Autowired
    private ProductService productService;

    @PostMapping("/create")
    public void createProduct(@RequestBody Product product){
        this.productService.createProduct(product);
    }

    @GetMapping("/all")
    public Mono<List<Product>> getAllProducts(){
        return Mono.fromSupplier(() -> this.productService.getAllProducts());
    }

    @DeleteMapping("/delete/{id}")
    public void deleteProduct(@PathVariable final String id){
        this.productService.deleteProduct(UUID.fromString(id));
    }

    @PutMapping("/update")
    public Product updateProduct(@RequestBody final Product product){
       return this.productService.updateProduct(product);
    }

}- application.yaml
server:
  port: 8080
spring:
  datasource:
    url: jdbc:postgresql://localhost:26258/vinsguru
    username: vins
password:- If you see the above set up, I am not doing anything special for CockroachDB. In fact, you can easily point your application from Postgres to CockroachDB without much change in your application. Thanks to Spring Boot.
- You can call the GET / POST / PUT / DELETE methods. We can see the records created, updated , deleted as expected.
- Inserted / deleted / updated operations are also synchronized with other nodes.
Fault Tolerance & Recovery:
- We have set up a 3 node cluster. You can connect to any node in the cluster. The application will still work.
- Instead of connecting to any specific node, We can use a proxy service and place the nodes behind that proxy. So that load can be balanced across the nodes.
- Even in case of any node failure, our application can still work as we have multiple nodes and replicas of our data.
All the source code is available here.
Happy coding 🙂