
Overview:
In this article, I would like to show how we could improve the performance of our application with Spring WebFlux Redis Integration.
Spring WebFlux Redis Integration:
Redis stands for Remote Dictionary Server. It is an in-memory, fastest NoSQL DB primarily used for caching the frequently used data. It also has so many other features which we talk in this blog as part of other articles.
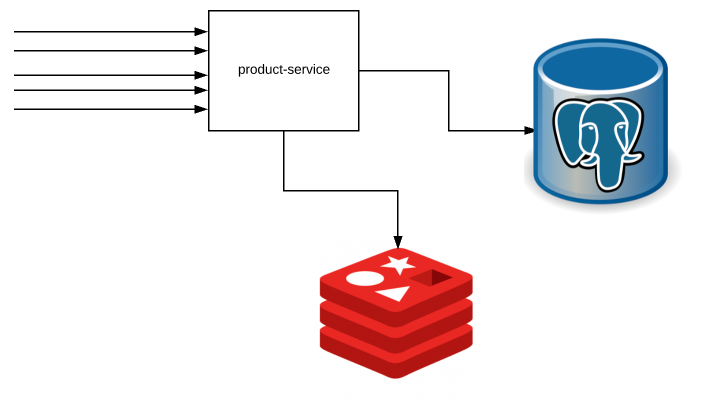
In the Microservices architecture, we might some services and they talk to each other to get the tasks done! In some cases, some Microservices might receive a lot of GET requests to get specific information about a resource. For example, a product-service might get frequent requests to get some product information. Instead of fetching the product information every time from DB, the Microservice might want to cache this information – so that we could avoid unnecessary DB calls which involves multiple table joins.
A microservice might cache this information in its local memory. But when we run multiple run instances of a same service, each and every instance has to store the information locally. But if the product information is updated, then we need to find a strategy to clear every instances local cache for the product. It is more challenging.
For microservices architecture, a distributed cache would be a better choice. This is where Spring Webflux Redis integration helps.
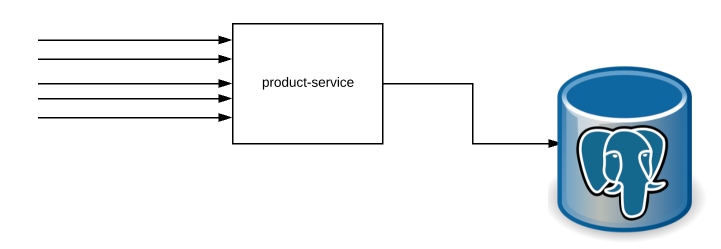
Sample Application:
Let’s consider a simple application, product-service which is responsible for providing product information based on the given id. Our underlying data source for the product service is a PostgreSQL DB. Our application will expose 2 APIs.
- GET
- API to provide the product info for the given product id
- PATCH
- API to update some product information.
Database Setup:
- I use below docker-compose file to setup Postgres.
- I have done volume-mapping to store the data on the disk under ‘data’ directory.
- There is also a file called ‘init.sql‘ to create a table when the db server starts up.
version: "3"
services:
  postgres:
    image: postgres
    container_name: postgres
    environment:
      - POSTGRES_USER=admin
      - POSTGRES_PASSWORD=admin
      - POSTGRES_DB=productdb
    volumes:
      - ./data/db:/var/lib/postgresql/data
      - ./data/init.sql:/docker-entrypoint-initdb.d/init.sql
    ports:
      - 5432:5432
  pgadmin:
    image: dpage/pgadmin4
    container_name: pgadmin
    environment:
      - PGADMIN_DEFAULT_EMAIL=admin@admin.com
      - PGADMIN_DEFAULT_PASSWORD=admin
    ports:
- 80:80- The init.sql file contains the following to create a product table.
CREATE TABLE product(
   id serial PRIMARY KEY,
   description VARCHAR (500),
   price numeric (10) NOT NULL,
   qty_available integer NOT NULL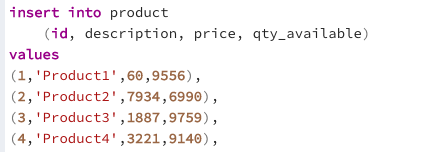
);- I inserted 1000 records into product table as shown here. (This information is also part of the init.sql which you can get it from GitHub)
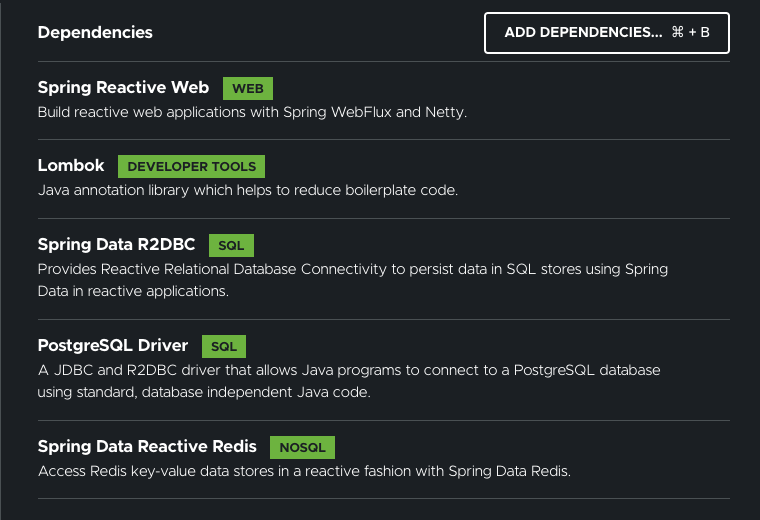
Spring WebFlux Redis – Project Setup:
- Let’s first create our application with the following dependencies.
- Product Entity
@Data
@ToString
@Table
public class Product {

    @Id
    private Integer id;
    private String description;
    private Integer price;
    private Integer qtyAvailable;

}- Product Repository
@Repository
public interface ProductRepository extends ReactiveCrudRepository<Product, Integer> {
}- Product DTO (If you are using Java 17+, use Record)
@Data
@ToString
public class ProductDto {

    private Integer id;
    private String description;
    private Integer price;
    private Integer quantityAvailable;

}- Entity to Dto convert util
public class EntityDtoUtil {

    public static ProductDto toDto(Product product){
        ProductDto dto = new ProductDto();
        dto.setId(product.getId());
        dto.setPrice(product.getPrice());
        dto.setDescription(product.getDescription());
        dto.setQuantityAvailable(product.getQtyAvailable());
        return dto;
    }

    public static Product toEntity(ProductDto dto){
        Product product = new Product();
        product.setId(dto.getId());
        product.setPrice(dto.getPrice());
        product.setDescription(dto.getDescription());
        product.setQtyAvailable(dto.getQuantityAvailable());
        return product;
    }

}- Product Service Interface
public interface ProductService {

    Mono<ProductDto> getProduct(Integer id);
    Mono<Void> updateProduct(Integer id, Mono<ProductDto> productDto);

}
We are going to provide 2 different implementations for the above product service.
- ProductServiceWithNoCache (An implementation which does not use Redis. Always talks to the DB)
- ProductServiceWithRedisCache (An implementation which uses Redis Cache)
- ProductServiceWithNoCache implementation
- It is enabled when the property cache.enabled is set to false.
@Service
@ConditionalOnProperty(name = "cache.enabled", havingValue = "false")
public class ProductServiceWithNoCache implements ProductService {

    @Autowired
    private ProductRepository productRepository;

    @Override
    public Mono<ProductDto> getProduct(Integer id) {
        return this.productRepository.findById(id)
                .map(EntityDtoUtil::toDto);
    }

    @Override
    public Mono<Void> updateProduct(Integer id, Mono<ProductDto> mono) {
        return this.productRepository.findById(id)
                .zipWith(mono)
                .doOnNext(t -> t.getT1().setQtyAvailable(t.getT2().getQuantityAvailable()))
                .map(Tuple2::getT1)
                .flatMap(this.productRepository::save)
                .then();
    }

}- ProductServiceWithRedisCache implementation
- It is enabled when the property cache.enabled is set to true.
- It simply extends the NoCache service.
- When we receive the GET request, we would first check the cache, if it is present, we would simply return it. Otherwise, we would query the DB and store in the cache for future use.
- When we receive any PUT/PATCH/DELETE request, we would update the DB first and then we clear the cache immediately. This is important. Otherwise we would serve stale data.
@Service
@ConditionalOnProperty(name = "cache.enabled", havingValue = "true")
public class ProductServiceWithRedisCache extends ProductServiceWithNoCache {

    private static final String KEY = "product";

    @Autowired
    private ReactiveHashOperations<String, Integer, ProductDto> hashOperations;

    @Override
    public Mono<ProductDto> getProduct(Integer id) {
        return hashOperations.get(KEY, id)
                             .switchIfEmpty(this.getFromDatabaseAndCache(id));
    }

    @Override
    public Mono<Void> updateProduct(Integer id, Mono<ProductDto> mono) {
        return super.updateProduct(id, mono)
                                  .then(this.hashOperations.remove(KEY, id))
                                  .then();
    }

    private Mono<ProductDto> getFromDatabaseAndCache(Integer id) {
        return super.getProduct(id)
                    .flatMap(dto -> this.hashOperations.put(KEY, id, dto)
                                                       .thenReturn(dto));
    }

}- Product Controller
@RestController
@RequestMapping("product")
public class ProductController {

    @Autowired
    private ProductService productService;

    @GetMapping("{id}")
    public Mono<ProductDto> getProduct(@PathVariable Integer id){
        return this.productService.getProduct(id);
    }

    @PatchMapping("{id}")
    public Mono<Void> updateProduct(@PathVariable Integer id, @RequestBody Mono<ProductDto> mono){
        return this.productService.updateProduct(id, mono);
    }

}- application.properties
spring.r2dbc.url=r2dbc:postgresql://localhost:5432/productdb
spring.r2dbc.username=admin
spring.r2dbc.password=admin
cache.enabled=false- Run the application. Send a Get request and verify the response to see if everything works as expected.
// http://localhost:8080/product/2

{
   "id":2,
   "description":"Product2",
   "price":1297,
   "quantityAvailable":69
}
Performance Run 1:
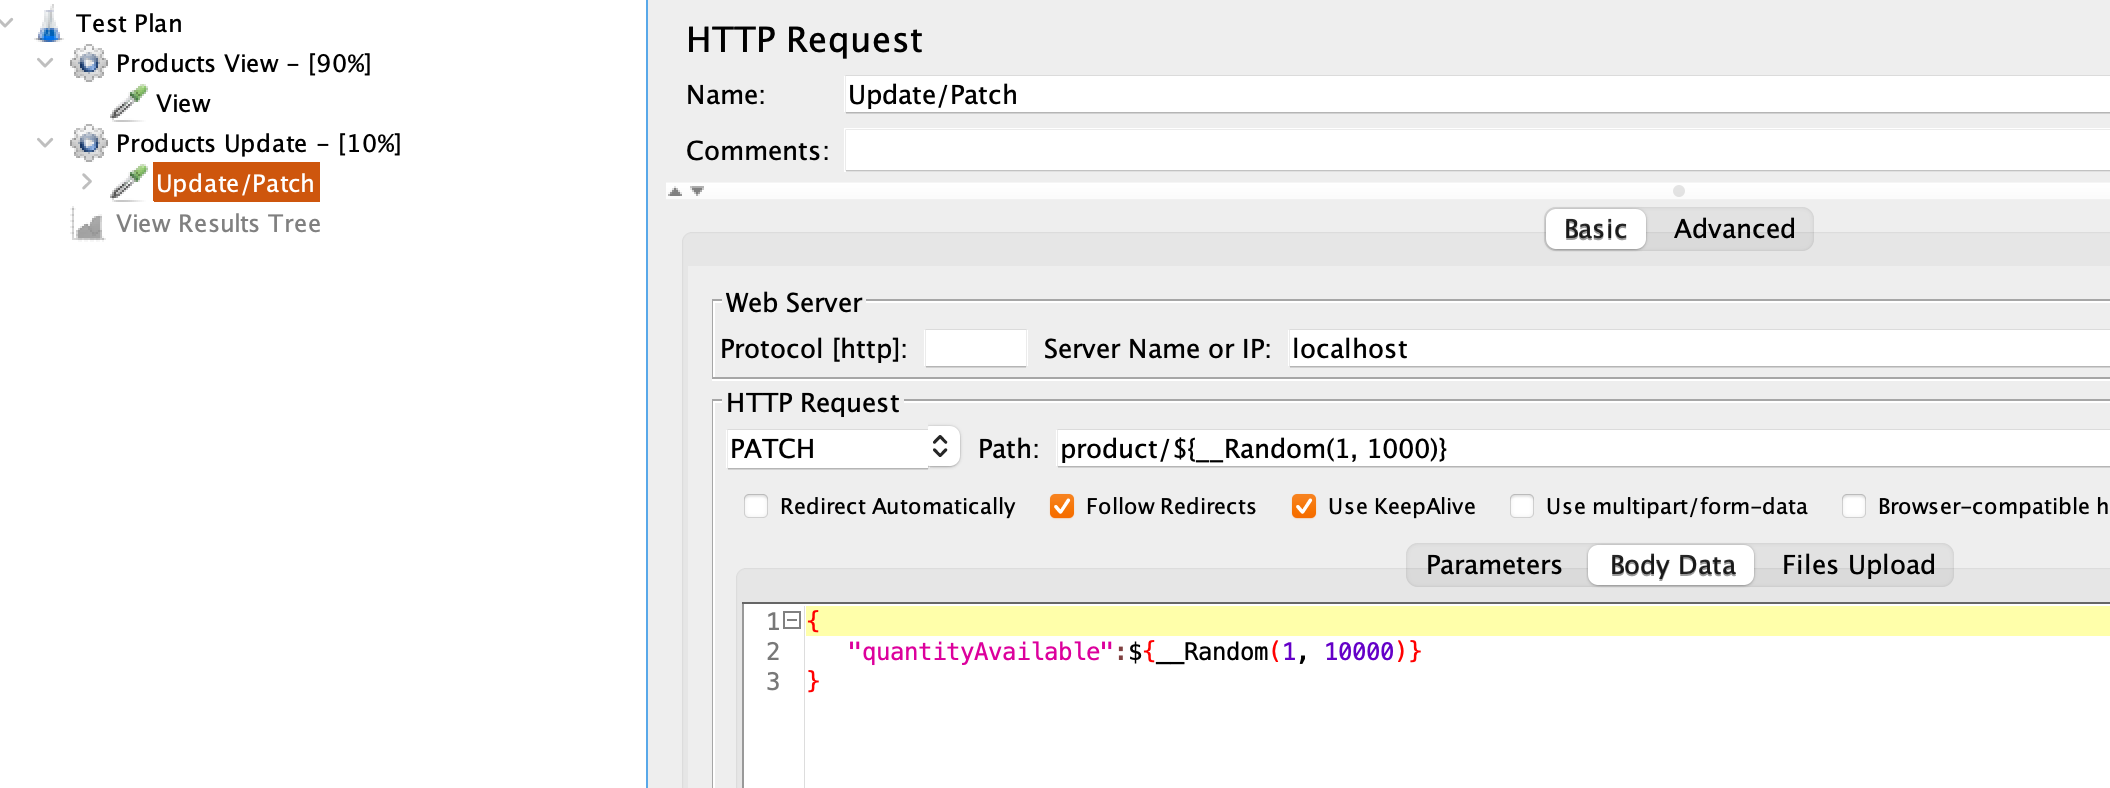
- In our first performance test, We are not going to enable cache. So cache.enabled will be set to false. The application will talk to DB directly for all the GET/PATCH requests.
- I created a simple performance test script using JMeter. I will be testing the application with below workload. There will be 200 concurrent users load.
- 180 concurrent users would be accessing the application – call the GET product request for a random product id.
- 20 concurrent requests would be made to the application to update the product available quantity (PATCH)
Results:
- Without caching, our application was able to process ~3850 requests / second.

Now let’s see how we can improve performance using Spring WebFlux Redis Integration!
Spring WebFlux Redis:
- Let’s bring Redis into our application by adding the redis container in our docker-compose yaml.
redis:
    container_name: redis
    image: redis
    ports:
- 6379:6379- The idea here is – The app will check with Redis first before contacting the Postgres & if there is any product update, it would clear the cache to avoid serving stale data!
- Restart the application by enabling the cache as shown here.
cache.enabled=true- Now at this point, Spring WebFlux is ready to use Redis for caching.
Performance Run 2:
I reran the same performance test. If you see the result, The performance of our application has increased tremendously. Our application was able to process more than ~16000 requests / second just by adding Redis!

Udemy Course:
I have a 12 hour course which talks about Redis, its various data structures and how it can be used to develop various spring applications. Click on the image to go to Udemy course.
Summary:
We were able to successfully demo Spring WebFlux Redis Integration & improve the performance of our application. Most of the CRUD applications do a lot of READ than WRITE. So caching the frequently accessed information could improve the performance of the application. When you use this pattern, do remember to have the cache evicted policy – that is when to clear the cache (In our cache PATCH requests evict the cache). Otherwise we will end up serving stale data.
Learn more about Spring WebFlux Redis.
The source code is available here.
Happy learning 🙂
Hi Vinoth,
Thanks for great tutorial. I am not clear on how to execute the PATCH request, when I hit below nothing happed in redis cache.
curl --location --request PATCH 'http://localhost:8080/product/100' \
--header 'Content-Type: application/json' \
--data-raw '{
    "id": 100,
    "description": "Product100 - Updates",
    "price": 1756,
    "quantityAvailable": 1000
}'